Export or Import Mapping
The export and import feature in SyncNow allows organizations to transfer an existing mapping setup to another SyncNow deployment. This is particularly useful for testing changes in a test environment and then applying those changes to a production environment.
Exporting and importing mappings helps ensure consistency across different environments and streamlines the deployment process.
📝 Step-by-Step Guide
📤 Exporting a Mapping
-
Navigate to the Processes (Global Mappings) Page
Go to the Processes page where global mappings are managed. -
Press the Mapping Entities Button
This will take you to the mapping entities interface. -
Press the Export Mapping Button
Click the Export Mapping button.
A file with the extension *.snw will be downloaded to your computer.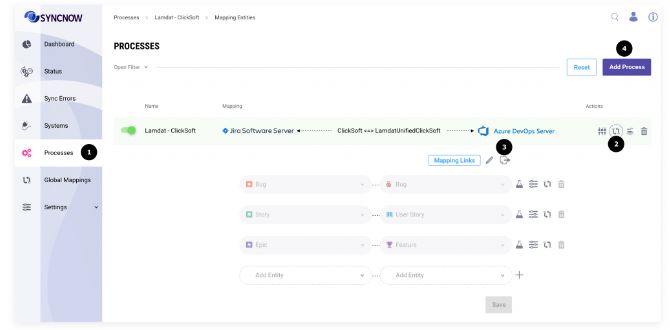
📥 Importing a Mapping
-
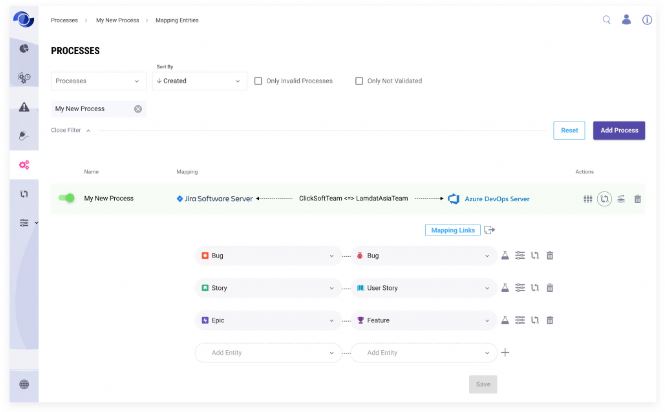
Navigate to the Processes (Global Mappings) Page
Return to the Processes page if not already there. -
Press Add Process (Add/Import Mapping) Button
Click the Add Process button, which allows you to add or import a new mapping. -
Upload the Mapping File
Select the previously exported *.snw file from your file system and upload it.
-
Press the Save Button
After uploading the file, click the Save button to complete the import process.
✅ Result
-
The new process with the imported local mapping has been created and is now available in your SyncNow deployment.
Tip:
Use export/import to easily migrate, back up, or replicate your synchronization mappings across test, staging, and production environments.